Table of Contents
Introduction
Materials for Pilates Springboards
Instructions for Building a Pilates Springboard
Pilates Springboard Customization Tips
Q&A
Conclusion
DIY Pilates Springboard: Fitness Equipment Build.
Introduction
A wooden board, springs, eye bolts, and other items are needed to build a Pilates springboard. Drill holes, attach eye bolts, and secure springs to the board. You may make a Pilates springboard for your workouts with patience and dedication.
Materials for Pilates Springboards
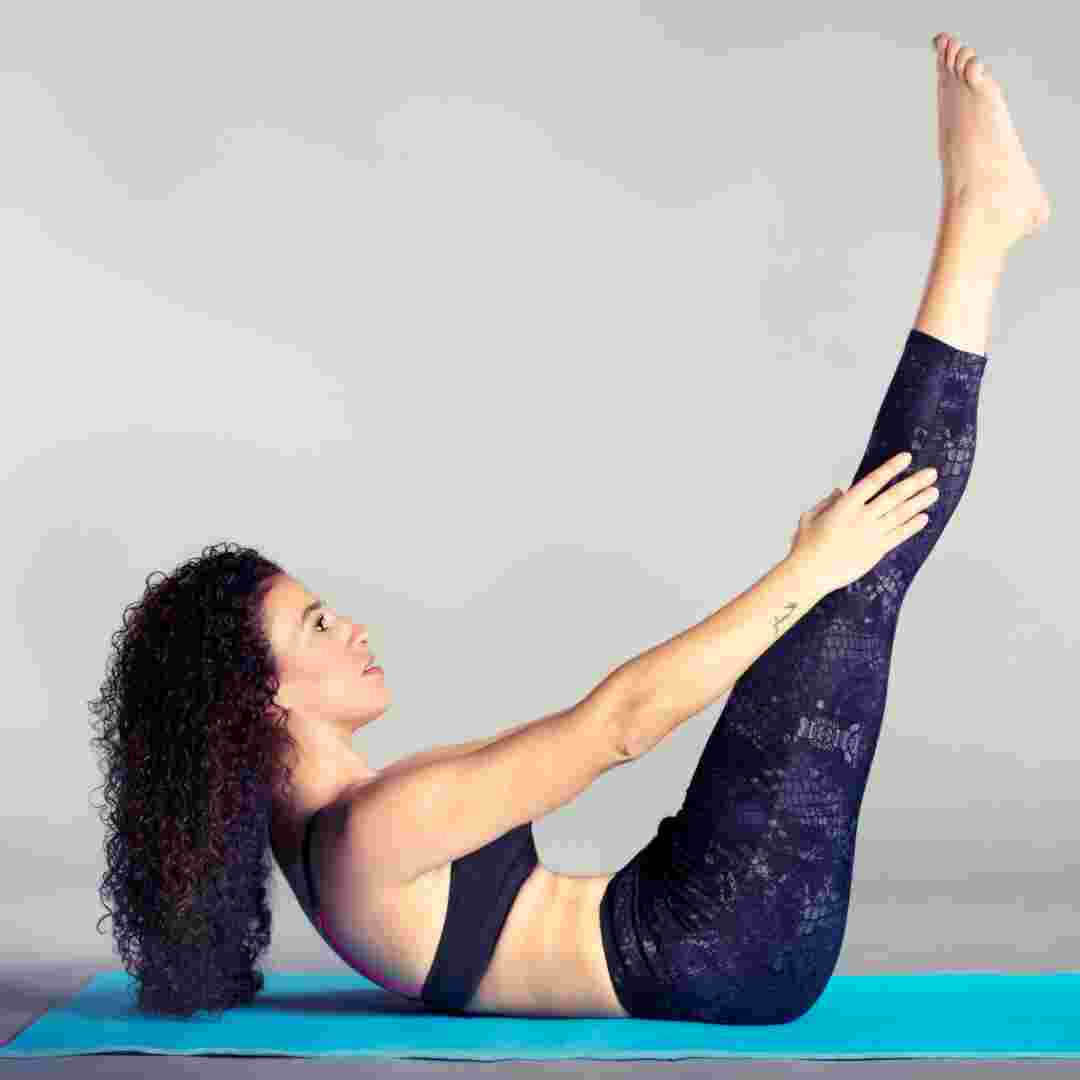
Pilates is a popular exercise that strengthens core muscles, improves flexibility, and aligns the body. The springboard is fundamental to Pilates. Pilates springboards can be utilised standing, sitting, and lying down. Building a Pilates springboard requires these materials.
1. Plywood
Start with plywood. Strong and robust plywood is ideal for springboard frames. The plywood sheet must be at least 4 feet by 8 feet and ¾ inch thick. You can buy plywood online or at a hardware store.
2. Springs
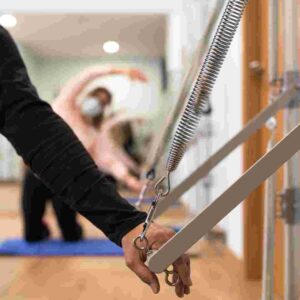
Spring material is next. A springboard needs springs to create resistance and tension during exercises. Pilates-specific springs are required. Springs should be strong enough to resist but not too hard to utilise. Pilates equipment companies and online retailers sell springs.
3. Eye Bolts
Eye bolts are another springboard needed. They secure the springs to the springboard frame. Eye bolts must be at least 3 inches long and ¼ inch in diameter. Hardware stores and online retailers sell eye bolts.
4. Carabiners
Carabiners connect springs to eye bolts. Choose carabiners that can support the springs and secure the attachment. Outdoor equipment suppliers and online retailers sell carabiners.
5. Foam Pad
Exercises are cushioned by foam padding. At least 1 inch of foam cushioning with 2.0 pounds per cubic foot density is needed. You may buy foam padding online or at a craft store.
6. Upholstery Material
Upholstery covers foam cushioning for a pleasant workout. You'll need sturdy, easy-to-clean upholstery fabric. Local fabric stores and online retailers sell upholstery fabric.
7. Wood Screws
Wood screws secure eye bolts to springboard frames. Purchase wood screws with a minimum length of 2 inches and a diameter of ¼ inch. Local hardware stores and online retailers sell wood screws.
In conclusion, a Pilates springboard needs plywood, springs, eye bolts, carabiners, foam cushioning, upholstery fabric, and wood screws. Build your springboard after gathering all the components. Your own Pilates springboard can be a fun and gratifying project that provides varied equipment for your Pilates routines.
Instructions for Building a Pilates Springboard
Pilates is a popular exercise that strengthens core muscles, improves flexibility, and aligns the body. The springboard is fundamental to Pilates. Pilates springboards can be utilised standing, sitting, and lying down. This article shows how to create a Pilates springboard step-by-step.
First, gather materials
Gathering materials is the first step in building a Pilates springboard. You'll need 4×8-foot plywood, springs, eye bolts, carabiners, handles, and foot straps. Buy these materials at any hardware shop or online.
Step 2: Cut plywood
After gathering all the components, cut the plywood to size. Any size plywood can be cut to your liking. Pilates springboards are typically 4 feet by 6 feet. Cut plywood to size with a saw.
Step 3: Install Eye Bolts
Installing eye bolts on plywood is next. Springs will be attached to the springboard via eye bolts. Each side of the plywood needs four eye bolts, totaling eight. Drill holes in plywood and screw in eye bolts.
Step 4: Springs Attach
After installing the eye bolts, attach the springs to the springboard. Each side of the springboard needs four springs, totaling eight. Attach springs to eye bolts with carabiners.
Step 5: Attach Handles and Foot Straps
Install the springboard handles and foot straps next. The handles are for standing and sitting, the foot straps for lying down. The springboard needs four handles and four foot straps. Screw handles and foot straps to plywood.
Step 6: Sand and Paint Springboard
After installing all components, sand and paint the springboard. Sand the plywood edges smooth, then paint the springboard your own colour. Any paint will work, however non-slip paint is advised for exercising.
Step 7: Springboard Test
The springboard is tested last to guarantee proper operation. Check the springs, grips and foot straps for security and functionality. Start Pilates with the springboard once you're sure it works.
Building a Pilates springboard is easy for anyone with basic DIY skills. Following this article's step-by-step guide, you may build your Pilates springboard and enjoy Pilates at home. Never use the springboard unsafely and seek a specialist before starting any exercise.
Pilates Springboard Customization Tips
Pilates is a popular exercise that strengthens core muscles, improves flexibility, and aligns the body. The springboard is fundamental to Pilates. Springboards are useful for leg presses, arm pulls, and abdominal work. Pilates enthusiasts may want to make their own springboard. Customising your Pilates springboard: tips and tactics.
Materials Required
Gather resources before making your Pilates springboard. Plywood, springs, eye bolts, carabiners, handles, and screws are needed. Hardware stores and online retailers sell these supplies.
Building the Frame
Build the frame for your Pilates springboard first. Cut the plywood to size and attach eye bolts to the top. Eye bolts will secure the springs to the board. Attach the handles to the board sides. The handles will be utilised for pulling and pushing activities.
Springs Attachment
After building the frame, add the springs. Spring resistance will help you exercise. You can buy springs of different strengths for your fitness level. Use carabiners to attach springs to eye bolts. Secure the springs to the board.
Springboard customization
After building your Pilates springboard, customise it. To make the board more comfy, pad it. For foot-pushing workouts, add a foot bar to the board's bottom. The board can also be equipped with straps or loops to expand your exercising options.
Use Your Springboard
Start utilising your Pilates springboard after customising it. The springboard can be used for leg presses, arm pulls, and abdominal work. The springboard can be used for stretching. Use good springboard form to avoid injury.
Building your own Pilates springboard is a terrific way to customise your practise. With a few materials and basic tools, you may make a versatile piece of resistance equipment for several activities. Customising your springboard makes it more comfortable and expands your exercising options. Use your springboard properly to avoid injury.
Q&A
1. What materials are needed to create a pilates springboard?
– A wooden board, springs, eye bolts, carabiners, and other hardware are needed.
2. Can I create a pilates springboard without woodworking?
Yes, but it may be difficult. Consider hiring a woodworker or taking a class.
3. Do pilates springboard tutorials exist online?
Several internet tutorials and resources provide step-by-step pilates springboard directions. Popular possibilities are YouTube and blog articles.
Conclusion
A wooden board, springs, eye bolts, and other components are needed to build a Pilates springboard. Drill holes, attach eye bolts, and secure springs to the board. A Pilates springboard may be a fun and gratifying DIY project with the correct equipment and materials.