Contents Table
Introduction
Supplies for Pilates Grip Socks
Instructions for Making Pilates Grip Socks
Pilates Grip Sock Customization Tips
Q&A
Conclusion
"DIY Pilates grip socks: add grip to your practise with just a few simple steps."
Introduction
Pilates grip socks require socks, non-slip fabric, scissors, and fabric adhesive.
Supplies for Pilates Grip Socks
Pilates is a popular workout that strengthens core muscles, improves flexibility, and balances the body. Grip socks are vital for Pilates. These socks improve floor grip to prevent workout slips. Pilates enthusiasts may like sewing grip socks. We'll explain Pilates grip socks' materials in this article.
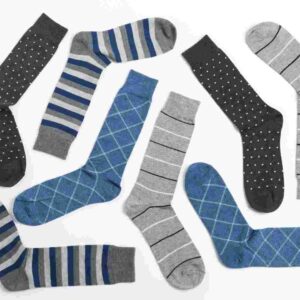
Plain socks are the initial requirement. Any socks that fit snugly on your feet are fine. Cotton or cotton mix socks are breathable and absorb moisture, thus they're recommended. Wear socks without heavy seams or patterns to avoid discomfort and grip issues.
Non-slip fabric is the second need. Silicone or rubber cloth with a rough surface improves floor traction. Craft stores and online retailers sell non-slip fabric. It comes in many colours and patterns to complement your style.
Use fabric glue or a sewing machine to apply the non-slip fabric on the socks. Fast and easy, fabric glue may not last as long as sewing. Sewing non-slip fabric requires a needle and thread that match its colour.
You must prepare the socks before applying the non-slip fabric. Wash and dry them to eliminate dirt and oils that could impact non-slip fabric adhesion. Turn the socks inside out and lay them flat.
Next, cut little pieces of non-slip fabric for the socks' bottoms. They can be sliced into circles, squares, or other shapes. Since the ball and heel of your foot need the most grip, make sure the pieces are large enough.
Apply a little fabric adhesive to the back of each non-slip fabric and press it firmly onto the sock's bottom. Seal the borders and remove air bubbles. Repeat with the other sock and let dry for 24 hours before wearing.
Pin the non-slip fabric pieces to the sock bottom before stitching. Sew around each piece's edges to secure them to the sock with a needle and thread. Trim any stray threads and repeat for the other sock.
In conclusion, sewing your own Pilates grip socks is fun, easy, and can save you money and give you a personalised training gear. Simple socks, non-slip fabric, and fabric adhesive or a sewing machine are needed to make these. Create grip socks that improve your Pilates practise and protect you from falls by following the procedures above.
Instructions for Making Pilates Grip Socks
Pilates is a popular workout that strengthens core muscles, improves flexibility, and balances the body. Grip socks are vital for Pilates because they give traction and stability. Make your own Pilates grip socks for a fun and affordable DIY project. Making Pilates grip socks is explained step-by-step in this post.
First: Gather Supplies
Making Pilates grip socks requires these materials:
– Plain cotton or cotton blend socks
Non-toxic, non-slip fabric paint
– Paintbrush – Cardboard/plastic sheet – Pencil
Use scissors
Second: Make a Template
Create a grip dot template before painting. On cardboard or plastic, draw little circles using a pencil. Adjust the circle diameter to your liking, but it should be roughly 1 cm. Cut the circles with scissors to make a grip dot stencil.
Step 3: Paint Grip Dots
Painting the socks' grip dots is next. Apply the stencil to the sole of the socks on a flat surface. Fill the stencil with fabric paint using a paintbrush. Use enough paint to make a thick, non-slip grip dot. Repeat until all sock portions are painted. Grip dots can be used to make a pattern or cover the sock sole.
Step 4: Dry Paint
Allow the socks to cure for 24 hours after painting the grip dots. The drying time depends on the fabric paint, so read the bottle directions. Try on the socks and test the grip after the paint dries.
Step 5: Sock wash and care
Properly washing and caring for socks prolongs grip dots. Use cold water and no bleach or fabric softener to wash socks. Do not dry socks in a dryer as it can destroy the grip dots. Touch up grip dots with fabric paint if they wear off.
In conclusion, constructing Pilates grip socks is a fun and inexpensive DIY project that may provide you bespoke socks that meet your style and needs. These five steps will help you make Pilates grip socks for a safe and comfortable workout. Use non-toxic, non-slip fabric paint, make a grip dot template, let the paint dry for 24 hours, and wash and care for the socks. Happy making!
Pilates Grip Sock Customization Tips
Pilates is a popular workout that strengthens core muscles, improves flexibility, and balances the body. Grip socks are vital for Pilates because they give traction and stability. Creating your own Pilates grip socks is a fun and creative way to customise your training gear. This post will teach you how to make Pilates grip socks.
Materials Required
Materials for Pilates grip socks include:
– Plain socks – Fabric or puffy paint
A brush or sponge
– Sock inserts: cardboard or paper – Pencil or marker
Guided Steps
1. Pick your socks
Choose plain socks to start producing Pilates grip socks. Use any socks, although ankle-length or low-cut socks are better for Pilates. Socks should fit snugly on your feet.
2. Add paper or cardboard
Put cardboard or paper in the socks to prevent paint from bleeding. This will also keep socks flat and wrinkle-free.
3. Sketch your idea
Draw your pattern on the socks' bottoms with a pencil or marker. Any design is fine, just make it easy to paint. Pilates grip socks with dots, stripes, and geometric forms are popular.
4. Paint socks.
Overpaint the socks' design using fabric or puffy paint. The type of paint determines whether you use a paintbrush or sponge. Paint the design evenly and completely.
5. Dry the socks.
After painting the socks, let them dry. Depending on the paint, this may take many hours. Before wearing, dry the socks fully.
6. Grip test
Walk on a smooth area to test the socks' grip before Pilates. Ensure the paint has enough grip to prevent slips during the activity.
Tricks and Tips
High-quality cloth or puffy paint will prolong the design.
– Before the paint dries, clean up any mistakes with a moist cloth.
Create unique Pilates grip socks by experimenting with designs and colours.
To preserve the paint, wash the socks inside out.
Conclusion
DIY Pilates grip socks are a fun and easy way to customise your training gear. You can make attractive, traction-filled Pilates socks with a few simple materials and some creativity. Make Pilates grip socks today with our step-by-step guide and recommendations!

Q&A
1. What materials are needed to manufacture pilates grip socks?
– Non-slip cloth, elastic, and a sewing machine are needed.
2. How do I cut socks' non-slip fabric?
– Cut fabric rectangles somewhat larger than your foot.
3. What is the best way to attach socks' elastic?
– Sew the elastic to the fabric's top edge, extending it slightly for a snug fit.
Conclusion
Conclusion: Pilates grip socks require non-slip fabric, elastic, and a sewing machine. Sew elastic to the edges after cutting the fabric to size. Finally, coat the socks' bottoms with fabric paint or adhesive grip dots.


